이전에 계획 했던 대로 CSS를 적용했다.
CSS를 하기 위해 많은 라이브러리가 있지만, Styled-components를 활용했다. 닫기 같은 Icon은 Bootstrap을 활용했고, 이미지들은 unsplash.com에서 받아와서 활용했다.
*Styled-components 설치방법
npm install @types/syled-components*bootstrap 설치방법
npm install @types/bootstrap
대략적인 구도는 이렇게 적용하였다.
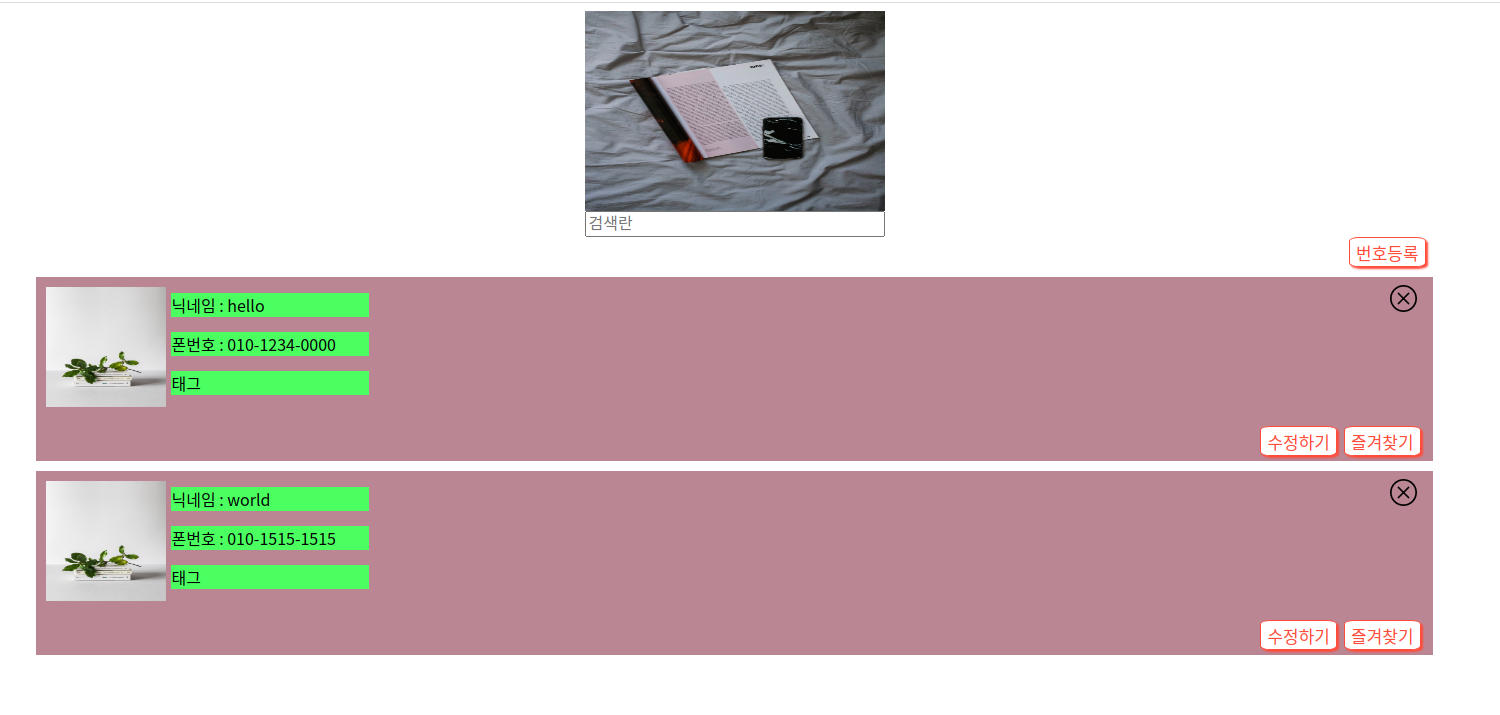
Main.tsx(윗부분이 react+typescript code / 아랫부분이 styled componets code)
import React from "react";
import logo from "./image/logo.jpg";
import styled from "styled-components";

function Main() {
  return (
    <Home>
      <Logoscreen>
        <img src={logo} alt="logo" />
      </Logoscreen>
      <InputBox>
        <input type="text" placeholder="검색란" />
      </InputBox>
      <WriteButton>
        <button>번호등록</button>
      </WriteButton>
    </Home>
  );
}

export default Main;
const Home = styled.div`
margin: 0 12%;
`;
const Logoscreen = styled.div`
display: flex;
justify-content: center;
img {
width: 300px;
height: 200px;
}
`;
const InputBox = styled.div`
display: flex;
justify-content: center;
input {
width: 292px;
height: 20px;
font-size: 16px;
}
`;
const WriteButton = styled.div`
display: flex;
justify-content: flex-end;
button {
background: #fff;
margin-right: 7px;
color: tomato;
border: 0.5px solid tomato;
border-radius: 13%;
box-shadow: 2px 2px 2px;
height: 30px;
font-size: 17px;
}
button:hover {
background-color: crimson;
color: black;
transform: translate(0, -5px);
}
`;PhoneForm.tsx(윗부분이 react+typescript code / 아랫부분이 styled componets code)
import React from "react";
import styled from "styled-components";
import image from "./image/image.jpg";

interface UserInfo {
  nickname: string;
  phone: string;
}

function PhoneForm({ nickname, phone }: UserInfo) {
  return (
    <Form>
      <Contents>
        <img src={image} alt="" className="resister-img" />
        <List className="list">
          <li>닉네임 : {nickname}</li>
          <li>폰번호 : {phone}</li>
          <li>태그</li>
        </List>
        <div className="close-btn">
          <button>
            <svg
              width="2em"
              height="2em"
              viewBox="0 0 16 16"
              className="bi bi-x-circle"
              fill="currentColor"
              xmlns="http://www.w3.org/2000/svg"
            >
              <path
                fill-rule="evenodd"
                d="M8 15A7 7 0 1 0 8 1a7 7 0 0 0 0 14zm0 1A8 8 0 1 0 8 0a8 8 0 0 0 0 16z"
              />
              <path
                fill-rule="evenodd"
                d="M4.646 4.646a.5.5 0 0 1 .708 0L8 7.293l2.646-2.647a.5.5 0 0 1 .708.708L8.707 8l2.647 2.646a.5.5 0 0 1-.708.708L8 8.707l-2.646 2.647a.5.5 0 0 1-.708-.708L7.293 8 4.646 5.354a.5.5 0 0 1 0-.708z"
              />
            </svg>
          </button>
        </div>
      </Contents>
      <Button>
        <button>수정하기</button>
        <button>즐겨찾기</button>
      </Button>
    </Form>
  );
}

export default PhoneForm;
const Form = styled.div`
  margin: 10px 12%;
  background: #b78b94;
`;

const Contents = styled.div`
  display: flex;
  flex-direction: row;

  .close-btn {
    flex: none;
    margin-left: auto;
    margin-right: 10px;
    margin-top: 7px;
    height: 25px;
    button {
      background: transparent;
      border: none;
    }
  }

  .resister-img {
    position: relative;
    top: 10px;
    left: 10px;
    width: 120px;
    height: 120px;
  }
`;

const List = styled.ul`
  list-style: none;
  margin-left: 15px;
  padding: 0;
  li {
    background: #7ef164;
    margin-bottom: 15px;
    width: 120%;
  }
`;

const Button = styled.div`
  display: flex;
  justify-content: flex-end;
  margin: 0px 5px 5px 5px;
  padding-bottom: 5px;
  button {
    background: #fff;
    margin-right: 7px;
    color: tomato;
    border: 0.5px solid tomato;
    border-radius: 13%;
    box-shadow: 2px 2px 2px;
    height: 30px;
    font-size: 17px;
  }
  button:hover {
    background-color: crimson;
    color: black;
    transform: translate(0, -5px);
  }
`;
※ Bootstrap 사용하기
bootstrap을 npm을 활용해서 설치를 하고, bootstrap 공식페이지로 간다.
Bootstrap
The most popular HTML, CSS, and JS library in the world.
getbootstrap.com
공식홈페이지로 가서 아래로 내려가면 Bootsrap Icons가 나온다. 여기에서 Get Bootsrap Icons 버튼을 클릭한다.

그러면 아래와 같은 페이지로 이동하게 되고 필요한 아이콘을 클릭한다. 원하면 우측 상단에 있는 검색도 가능하다.

원하는 Icon을 클릭하면 이지미와 같이 Copy HTML을 복사 할 수 있다. 복사를 해서 render 할 부분에 붙여넣기를 해준다. 그리고 적용할 때 주의 할점은 React는 class를 선언 해줄 때, className을 활용하기 때문에 class 부분을 className으로 수정하면 된다.

#Typescript#React#Hook#Phonebook#styled-components#bootstrap
'Coding > typescript' 카테고리의 다른 글
| React - Typescript + Hook(마무리) (0) | 2020.11.18 |
|---|---|
| React - Typescript + Hook (4) (0) | 2020.10.29 |
| React - TypeScript + Hook(2) (0) | 2020.10.27 |
| React - Typescript + Hook(1) (0) | 2020.10.07 |


